
How to take Measurements for your ZIPPERNETS
Step 1
Make sure your window frame has a flat surface border, and that its width is at least 2cm.
Step 2
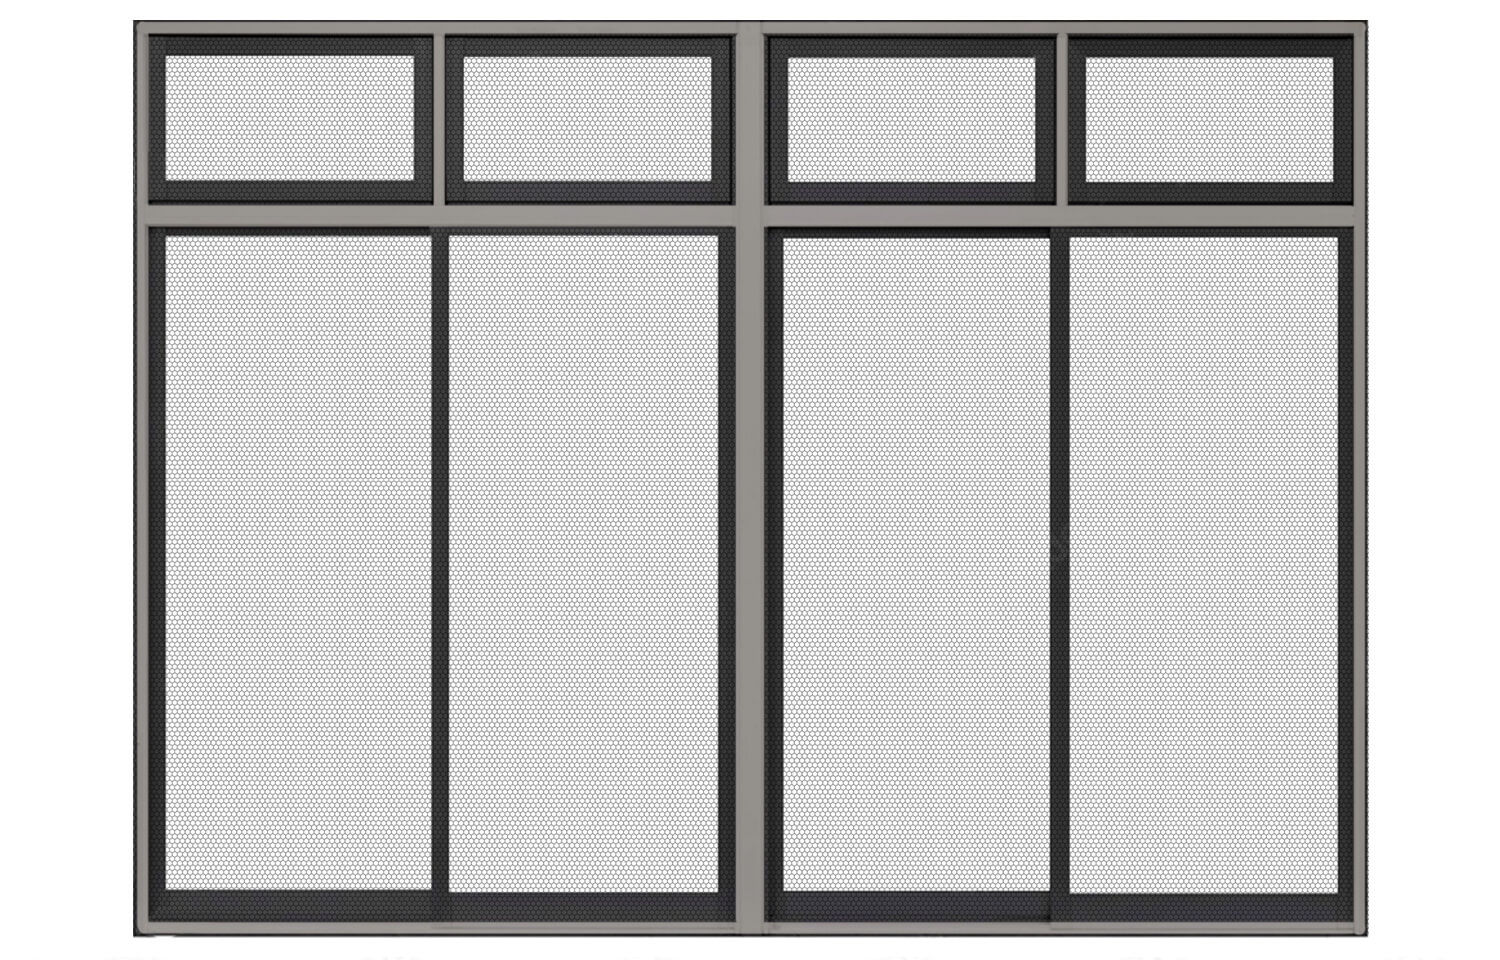
Start by planning which windows you would need to net up.
Step 3
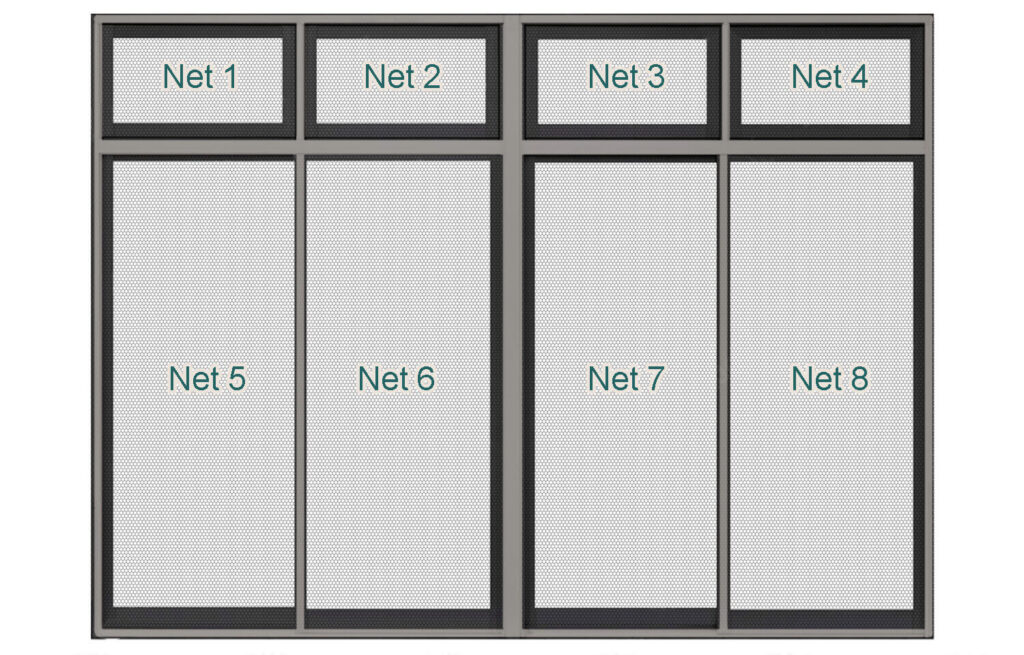
Next, plan out the configuration for your ZIPPERNETS. There are many ways you can configure your nets depending on the style of your windows and how they open.
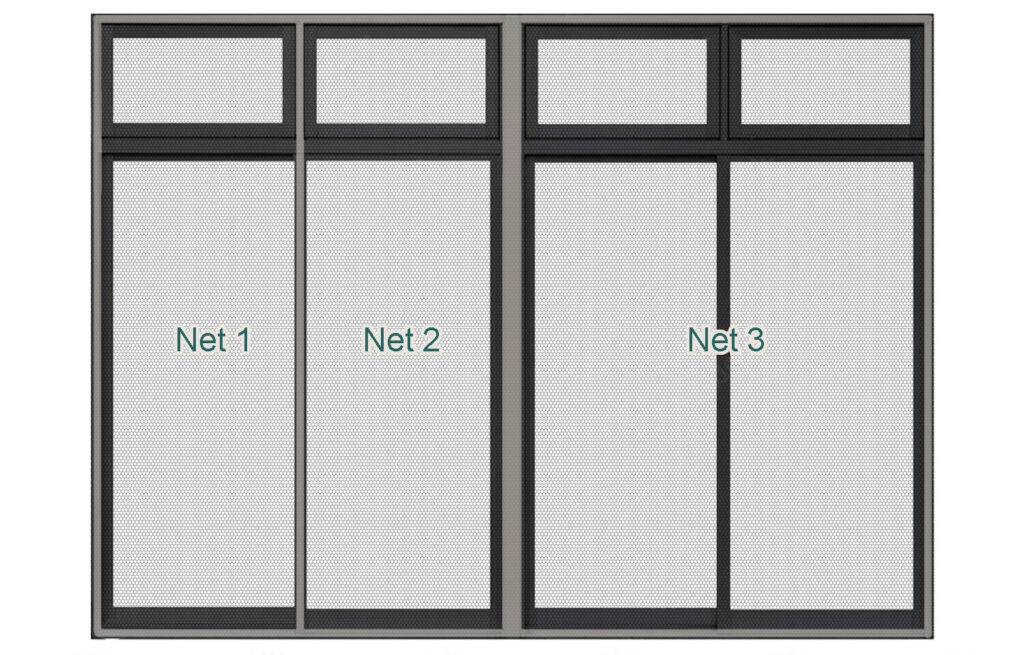
Here is a configuration where each awning window and panel has their own ZIPPERNETS.
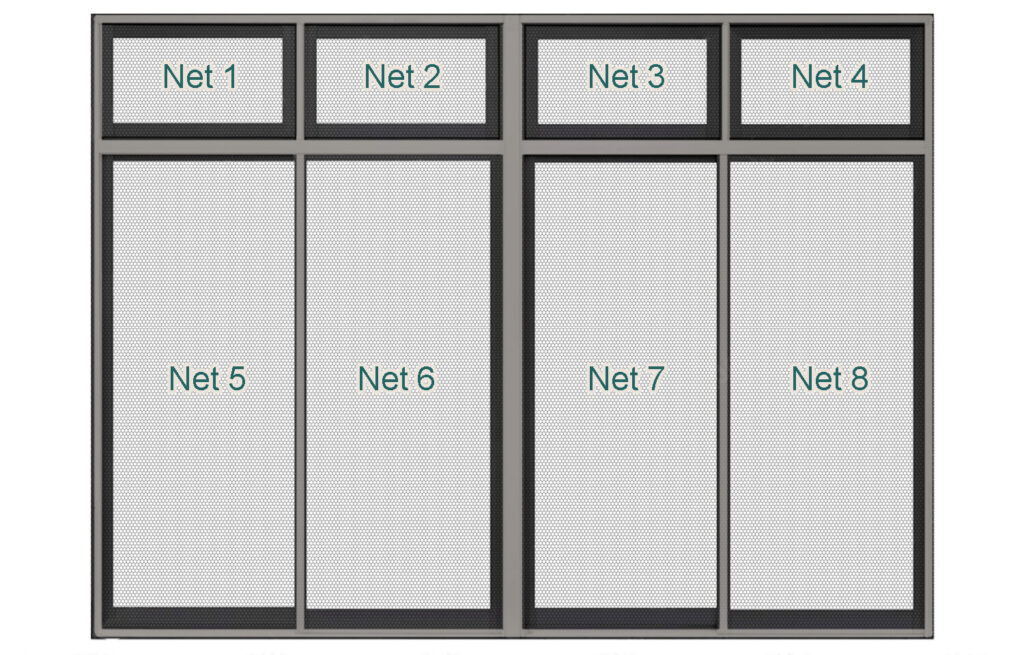
Here is a configuration where the casement windows are netted up in pairs with zippers added for ease of access.
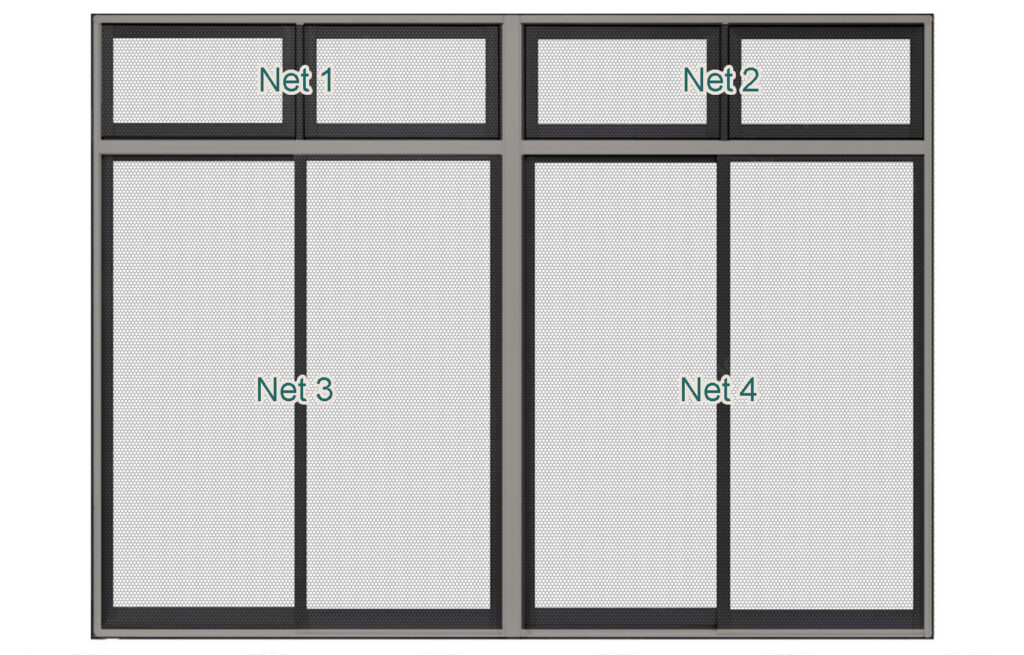
Group your windows vertically (Left half), or have 1 large net with a zipper in the middle (Right half).
Step 4
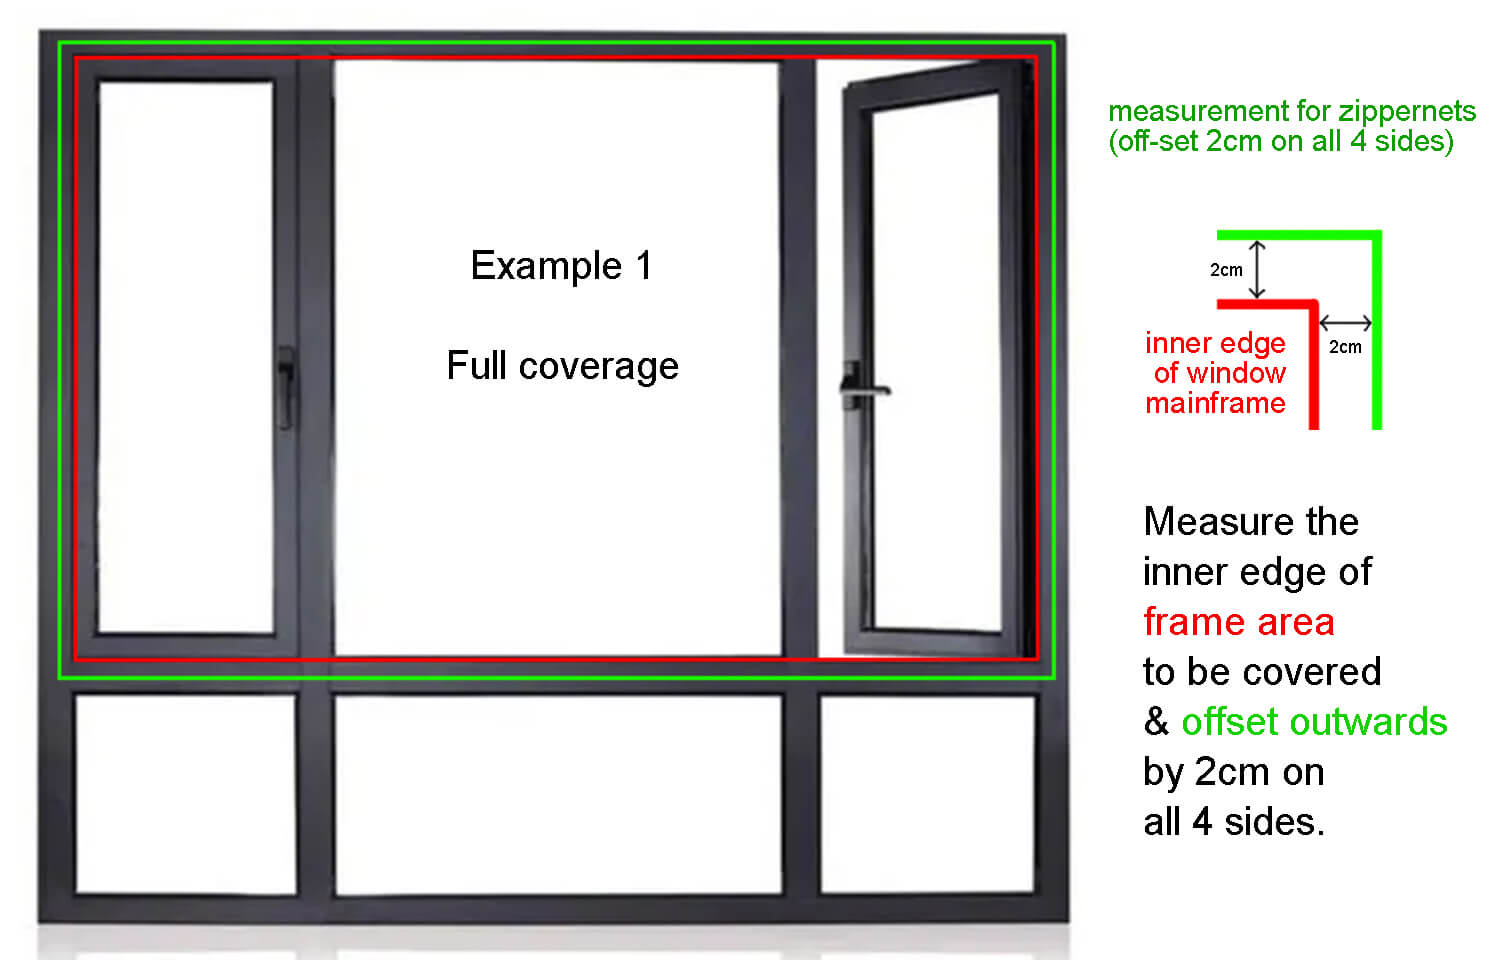
For each net configuration, measure the inner edge of the window frame.
Step 5
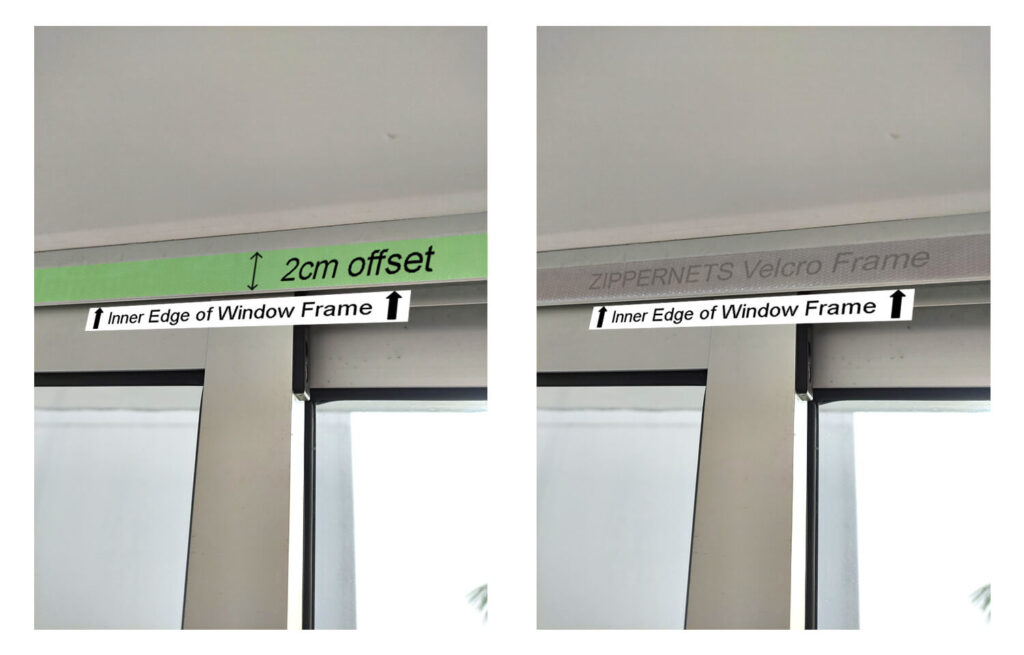
Then offset each side by 2cm to obtain the measure for your ZIPPERNETS.
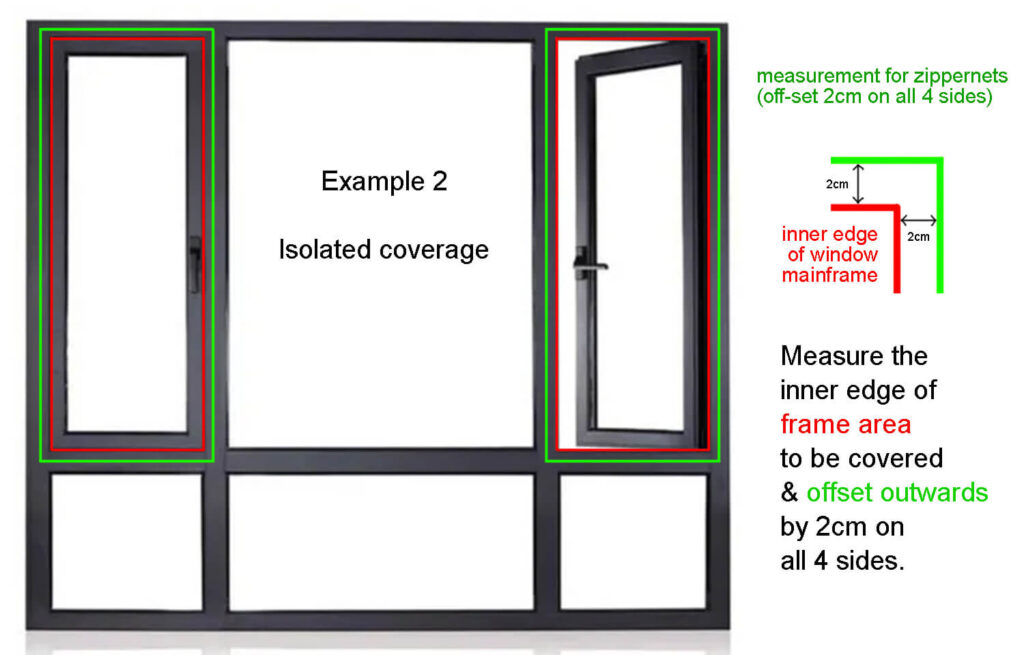
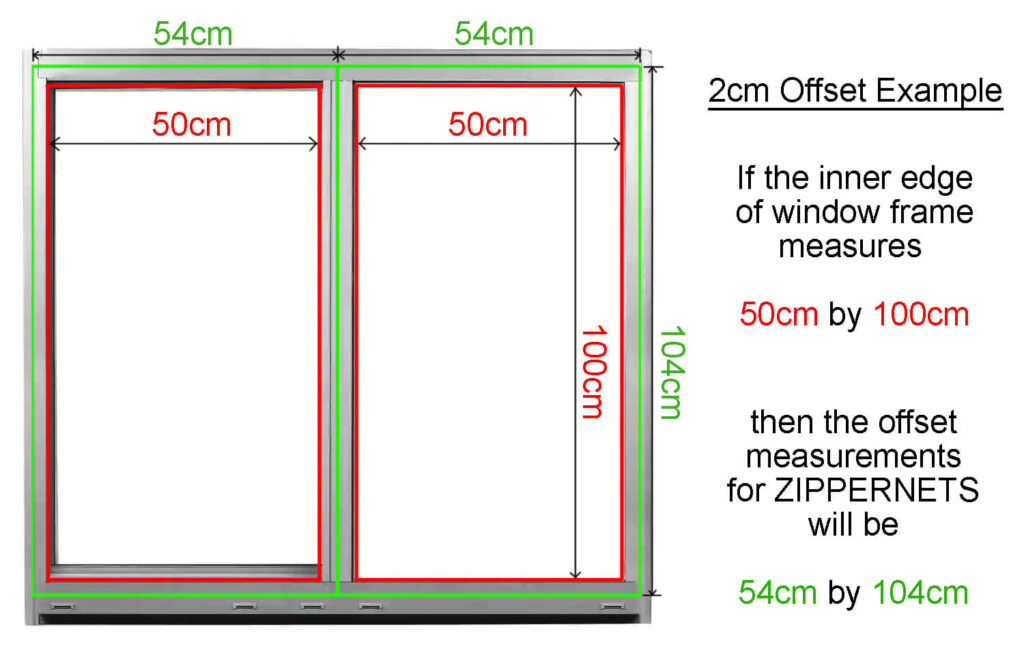
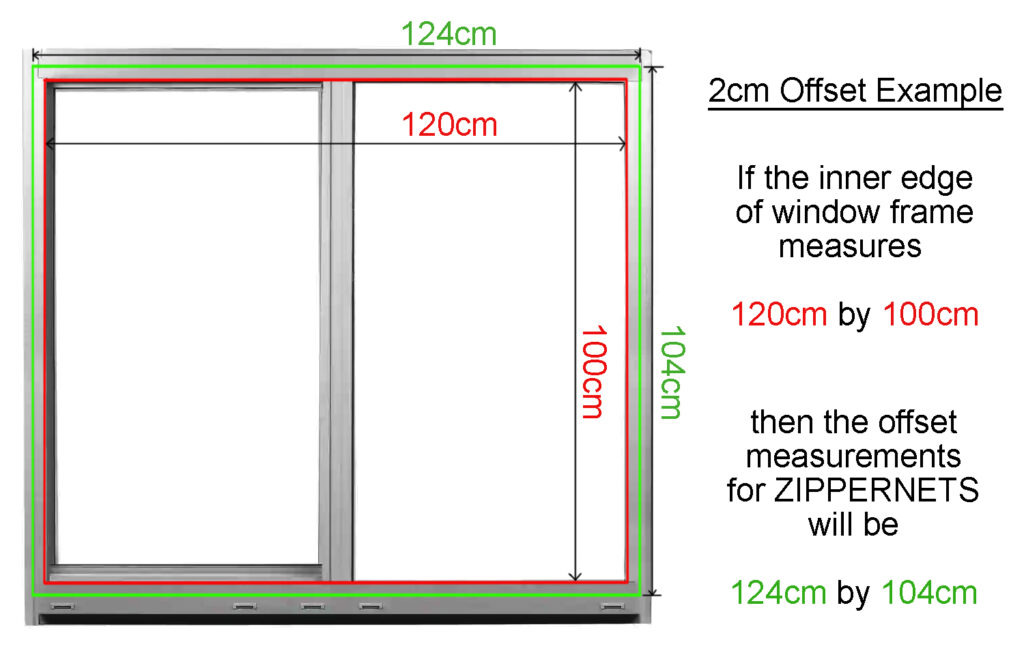
Here is an example of measuring the inner edge and offsetting it by 2 cm.
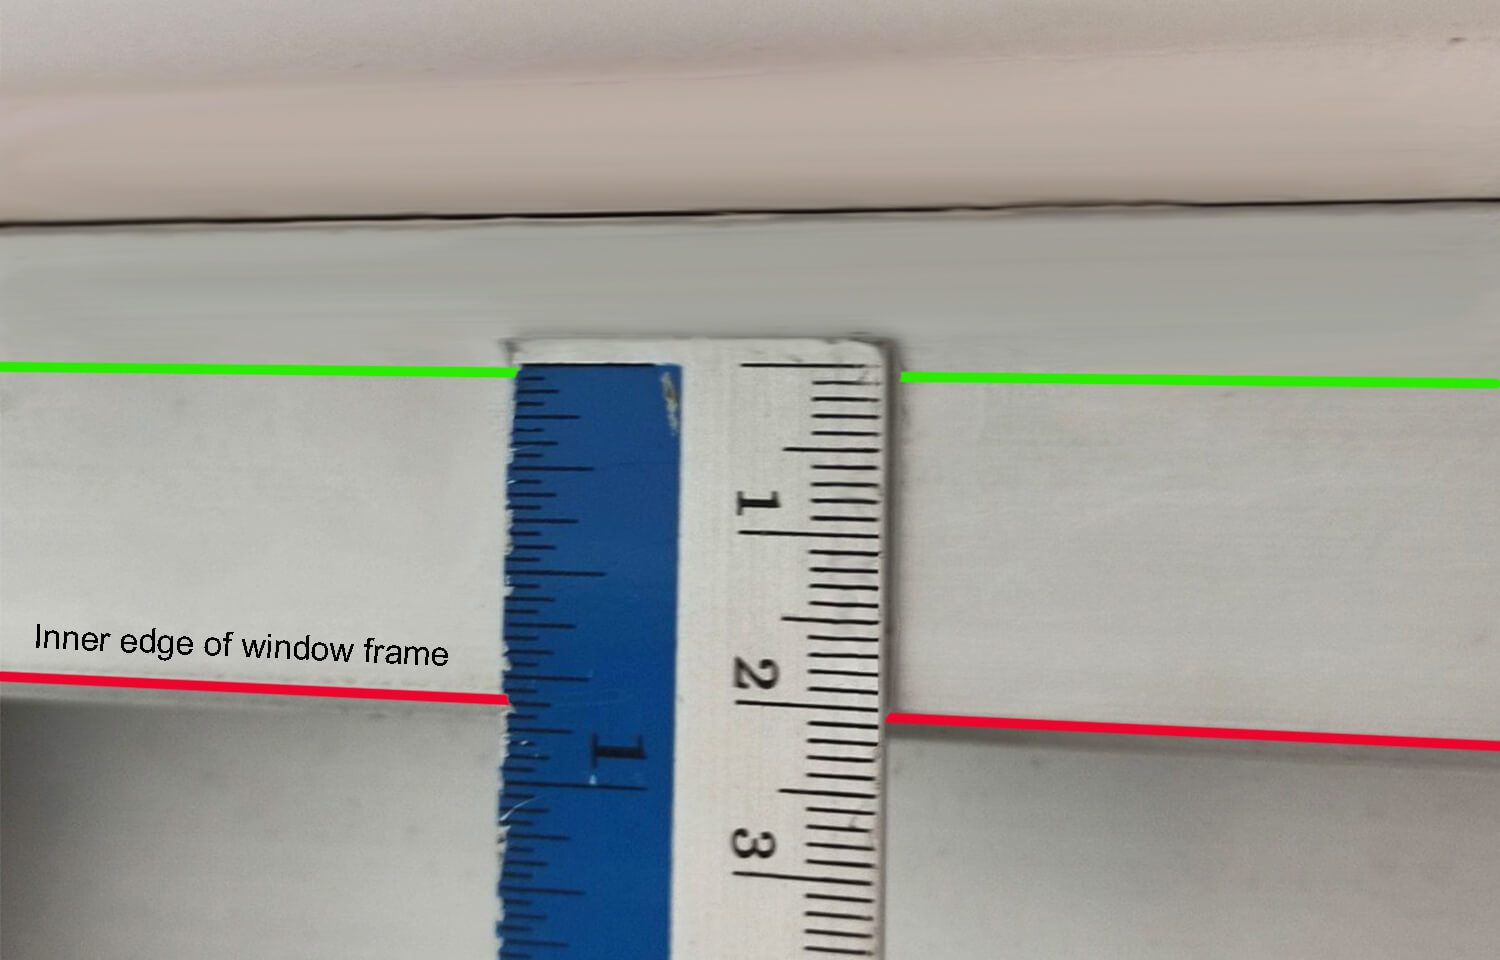
The 2cm space will be where your ZIPPERNETS frame will go on.
Another way to look at calculating the 2 CM offset
2 Nets Configuration
1 Net Configuration
need help?
Click on the link below to the contact form, or simply WhatsApp us for a chat!
Measuring combination frames
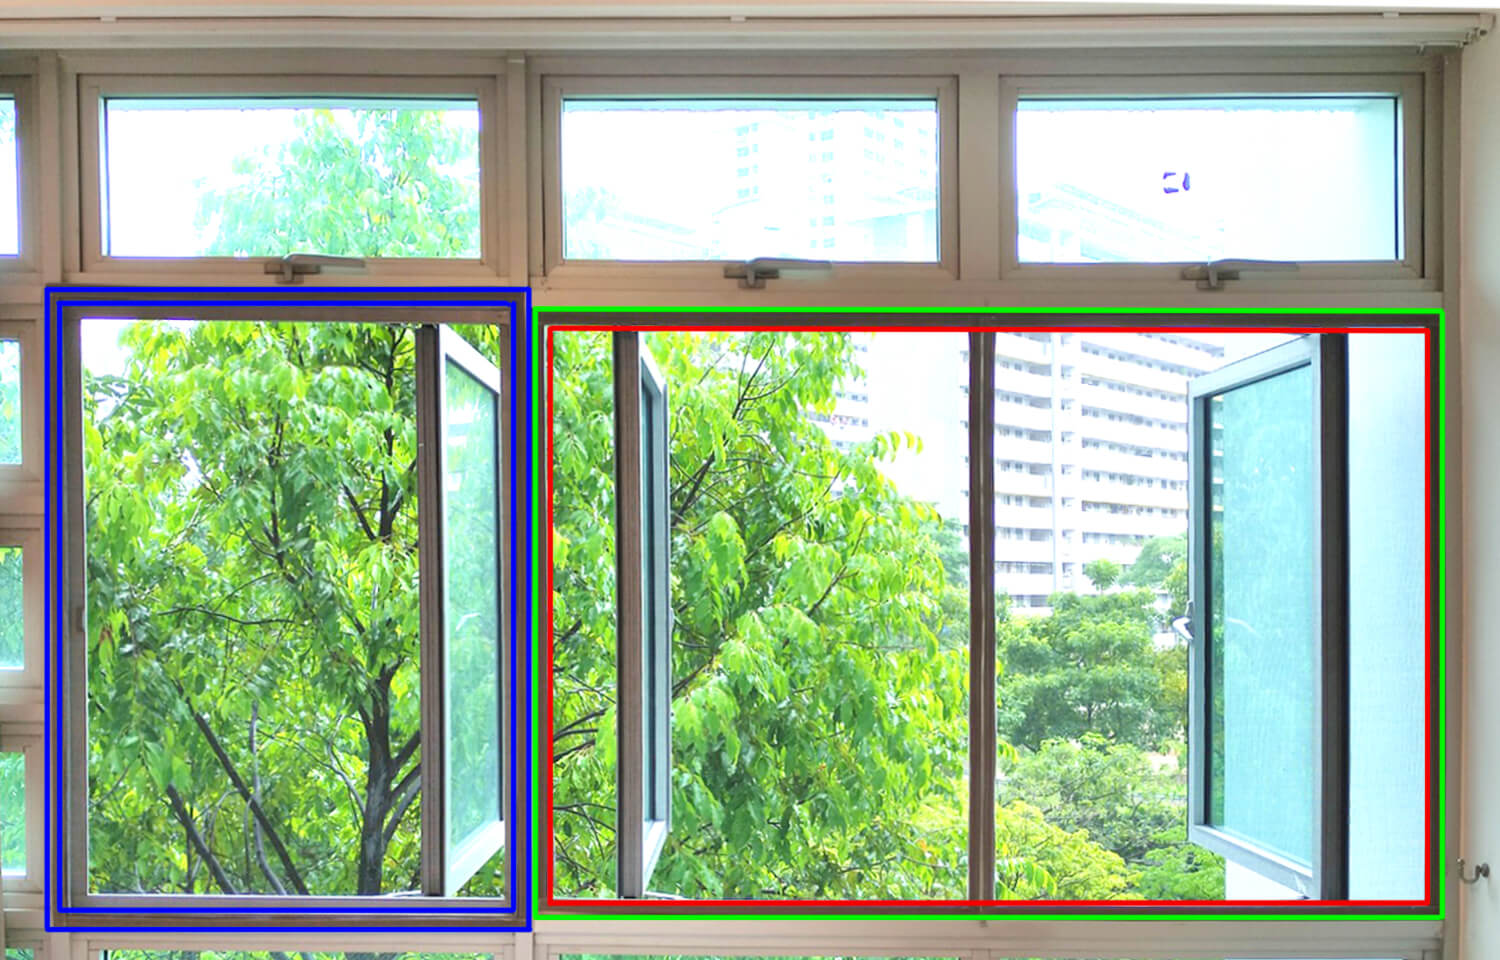
There are many cases where a set of windows is made up of a combination of frames and lever latches.
In situations like this, you will need to consider measuring the structural frame instead of the inner in order to give enough room for the lever latch.
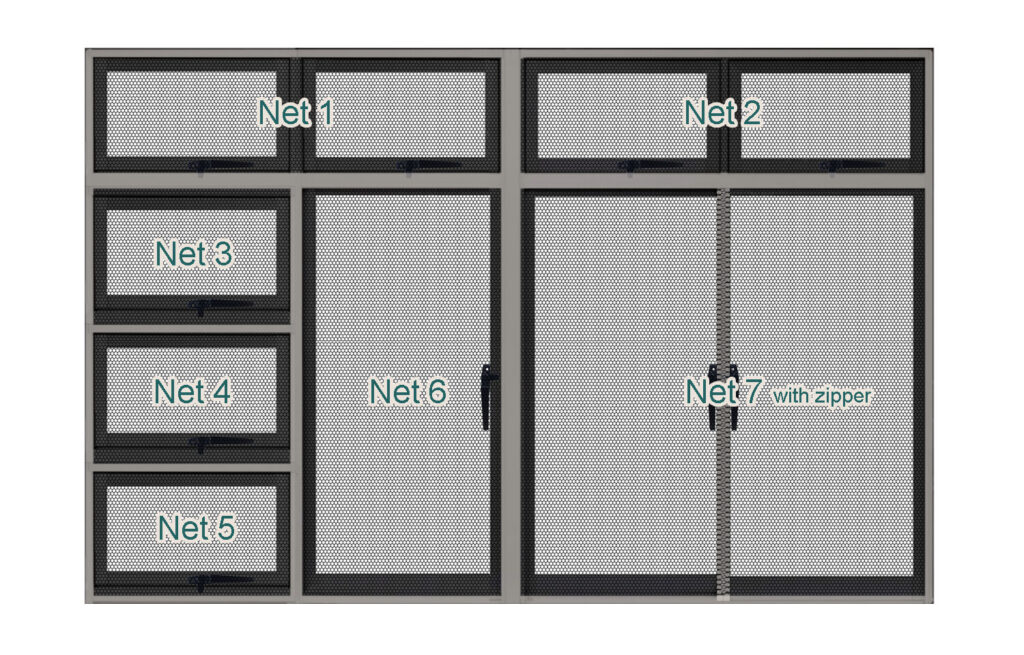
Examples of combination frames
Note 1
For this single-panel, because the handle is on the edge, the net needs to be installed on the structural frame in order to provide room for the 1.5cm handle protrusion.
Note 2
This double-panel has ZIPPERNETS installed on the window frame by measuring the inner edge of the frame and offsetting 2cm on all 4 sides.
As the protruding handle is in the middle, the wider net is able to accommodate the additional tension created by the 1.5cm protrusion. A zipper was added in the middle for easy access!
Pre-installation Tip: Measure net against opening to verify dimensions and ascertain placement of adhesive hook-side velcro
Installation Tips:
- Remove all traces of dried silicon/ glue with very sharp blade
- Clean surfaces thoroughly, rinse off all traces of detergent if used, dry thoroughly.
- Wipe over with ethanol or lighter fluid if required, wipe dry with clean cloth
- Repeat steps above until optimal cleanliness is achieved
- We DO NOT recommend applying the adhesive velcro onto the nets first as this usually results in skewed placements!
- Peel and apply adhesive velcro tape to the planned surfaces, be careful not to touch adhesive side with fingers or other objects
- Ensure no bubbles or creases before pressing firmly
- Carefully place insect screen onto hook-side velcro, remove & re-apply as necessary
- Gently brush with fingers along all sides for sufficiently secure attachment
Care & Maintenance Tips:
- Regular brushing with a soft-bristle brush or vacuum cleaner soft brush attachment to prevent build-up of dust and for preparation for wet/semi wet cleaning
- Semi-wet cleaning with soapy microfibre towel followed by clean moist wiping is possible
- Wet washing is possible with soft non-abrasive sponge or microfibre towel using mild detergent
- Rinse out thoroughly with clean water
- Use the provided velcro stickers on a cleaned bathroom wall to aid washing effort by hanging/flipping sides when washing nets
- Frame will attach as per normal to velcro even when wet/damp
- Short gentle spin-dry in washer possible with folded nets
- DO NOT machine-wash, tumble dry or apply heat in any way!
- Re-attach to windows from the top-down, side-to-side, adjusting as required.
- DO NOT pull the net tight as this may cause stress on the adhesive velcro resulting in release of the tape from the attached surface
- Extra adhesive velcro for part-replacement of peeled off adhesive velcro ends of frequent-use pieces
Keep your home insect-free with ZIPPERNETS


